
There’s something magical about making homemade pita bread—watching simple ingredients transform into soft, puffy rounds with perfect pockets ready to be filled with delicious toppings. Whether you’re using them for sandwiches, dipping them into hummus, or enjoying them fresh with a drizzle of olive oil, homemade pita is a game-changer in any kitchen.
Why Make Pita Bread at Home?
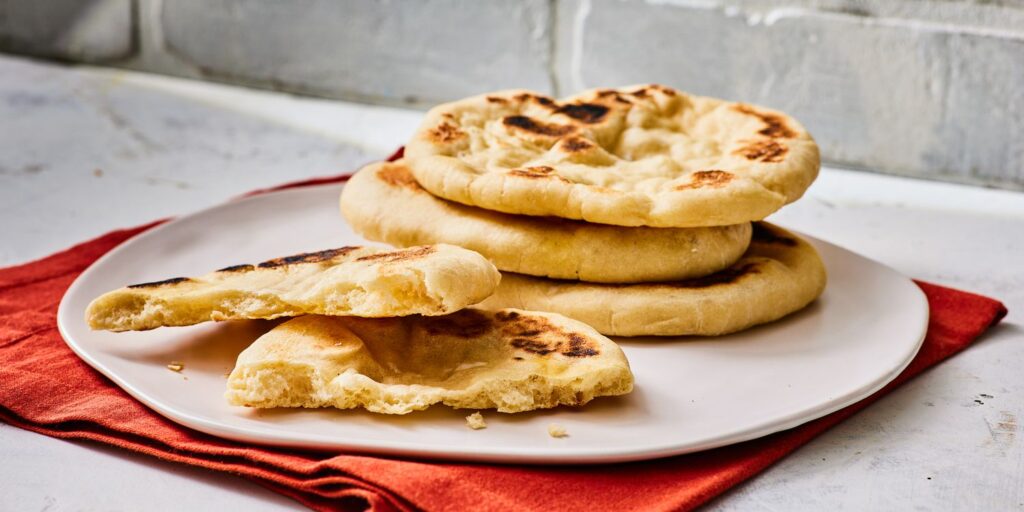
Store-bought pita can be dry and lack flavor, while homemade pita is fresh, soft, and has a slightly chewy texture with a beautiful puffed-up pocket. Making it from scratch allows you to control the ingredients, ensuring no unnecessary preservatives or artificial flavors. Plus, the satisfaction of baking your own bread is rewarding and fun!
Ingredients for Homemade Pita Bread
To make perfect homemade pita, you need just a few basic pantry staples:
- 3 ½ cups all-purpose or whole wheat flour
- 1 ½ teaspoons salt
- 1 tablespoon sugar or honey (for a hint of sweetness)
- 2 teaspoons instant yeast
- 1 ¼ cups warm water
- 2 tablespoons olive oil
These ingredients combine to create a dough that’s easy to work with and full of flavor.

Step-by-Step Guide to Making Pita Bread
1. Preparing the Dough
Start by mixing the flour, salt, sugar (or honey), and yeast in a large bowl. Slowly add warm water and olive oil while stirring to bring the dough together. Once the mixture forms a rough dough, transfer it to a floured surface and knead for about 8–10 minutes until it becomes smooth and elastic. If you have a stand mixer, you can knead the dough on low speed for about 5 minutes.
2. First Rise
Place the kneaded dough in a lightly greased bowl, cover it with a clean kitchen towel or plastic wrap, and let it rise for about 1–1.5 hours in a warm spot. The dough should double in size, which helps create the airiness needed for the classic pita pocket.
3. Shaping the Pita
Once the dough has risen, punch it down gently to release excess air. Divide it into 8 equal pieces and shape each piece into a ball. Roll each ball into a ¼-inch thick round, about 6 inches in diameter. Make sure not to roll too thin, as this can prevent proper puffing.
4. Cooking the Pita
There are two popular methods for cooking pita:
- Stovetop Method: Heat a cast-iron skillet or non-stick pan over medium-high heat. Place a rolled-out pita in the pan and cook for 1–2 minutes on one side until bubbles form. Flip and cook for another 1–2 minutes until it puffs up. Flip again if needed to ensure even cooking.
- Oven Method: Preheat your oven to 475°F (245°C) and place a baking stone or an inverted baking sheet inside to heat up. Place the pitas on the hot surface and bake for 3–5 minutes until they puff up and get slightly golden.
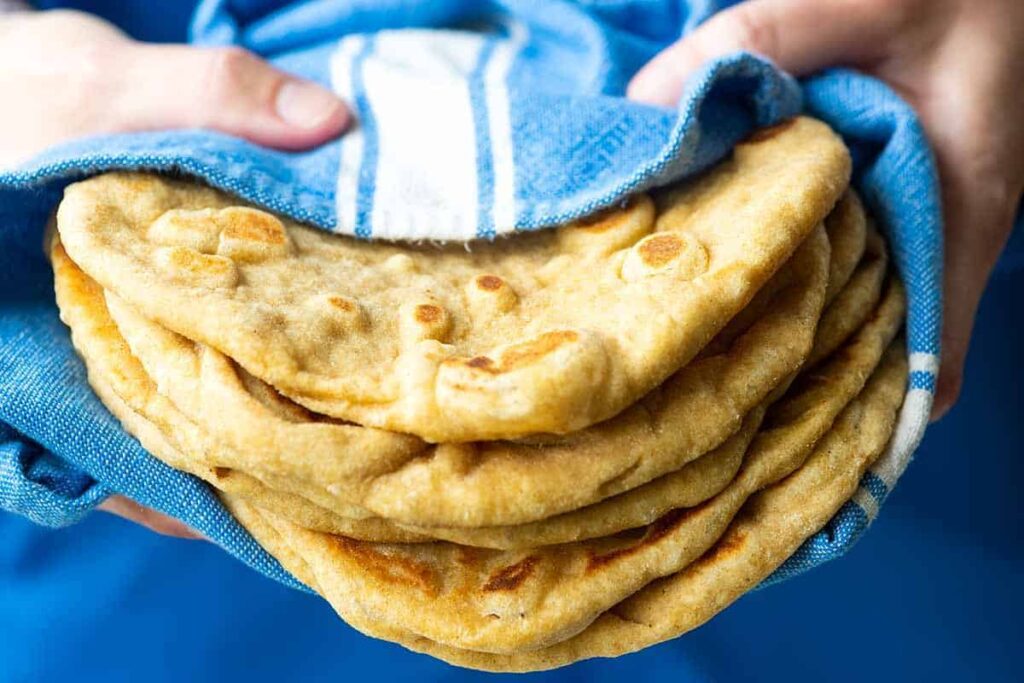
5. Storing and Serving
Once cooked, wrap the pitas in a clean kitchen towel to keep them soft. Serve them warm or store them in an airtight container for up to 3 days. Pita can also be frozen and reheated when needed.
Ways to Enjoy Homemade Pita Bread
- Stuffed Pita: Fill with falafel, grilled chicken, or roasted veggies for a delicious sandwich.
- Pita Chips: Cut into triangles, bake until crispy, and enjoy with dips.
- Classic Dips: Pair with hummus, tzatziki, or baba ganoush for a Mediterranean feast.
Making pita bread at home is easier than you think, and once you try it, you’ll never want store-bought again. Enjoy the process and the delicious results!